
Setup Guide
Import all files from the Audio Manager package into your project. The files are all contained in their own file structure, you can just import it as is, or merge the induvial folders into your own project. Once this is done you'll need to run the setup to start using the asset. If you plan to store your audio clips out side of "Assets/Audio" then you will need to change the base scanning directory from the Audio Manager Global Settings, found under Tools/Audio Manager | CG/Global Settings. If you just want the default directory you can just move on to the setup.
Setup & Usage of Scripts
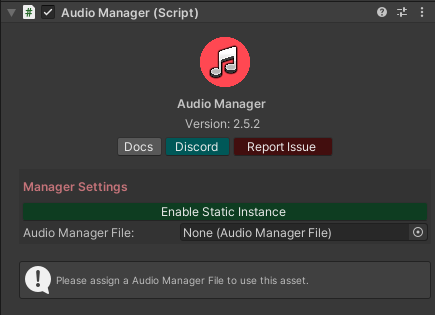
First add the audio manager component to any gameobject you like. We recommend putting the script on a empty gameobject. Once added the inspector will show up asking for an Audio Manager File before moving forward. If this is your first time adding an Audio Manager script to an object, you'll find that the field may be populated for you by the scripts automatic setup which generates the file structure for the asset and makes a default Audio Manager File for you to use.
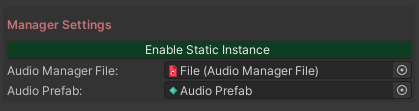
Next you'll need to assign the prefab that is to play the audio when you request it. We provide a correctly setup prefab in the package which we recommend you use with the asset. If you have lost it or are upgrading from an older version you may find your prefab is outdated. See the Audio Prefab section for more on how the prefab should be setup.

You can also assign audio mixers should you wish, though these are optional and are not required to use the manager to function. When you add mixer groups here you can use the ID listed next to them to use them when calling for a clip to be played without needed a direct reference to the mixer in the script you are calling from.

From here you are almost ready to use the Audio Manager. The inspector should now show the options for directories & clips. Open the directories tab by pressing the show directories button if it is not already open. Here you'll see an empty field and a button to continue. If you audio clips are going to be stored in the base scan directory you can just press the continue button and the manager will scan and add any clips it finds. However if you want to use a folder structure you'll need to define the subdirectories here. See the How Scanning Works section for examples of how to write these. You can add or remove elements with the + & - buttons along each row. When all the directories are valid the manager will scan, you may notice a little editor lag as this runs.
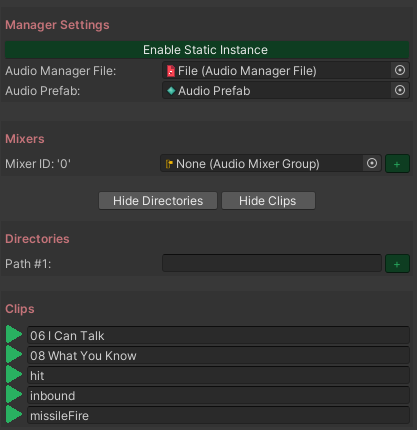
From here all of the clips in the directories selected should be in the clips section, press the show clips button to reveal the clips if needed, with both the directories and clip sections you can hide them to reduce the space the inspector takes up when not needed. Assuming you see the clips all listed you will be ready to use the Audio Manager.
Usage
The Audio Manager has a variety of methods you can use to play audio clips in your scene. There are two main ways of passing in params, either but individual params or with a hashtable. We provide a version of a hashtable called AudioArgs which will make sure the params you pass in are setup correctly, such as fixing formatting issues you may accidently make. To play any method you will need a reference to the script, this can either be the static instance provided or a direct reference made by yourself. Below is a few examples of how to play a clip called MySound:
// Reference to script
public AudioManager audioManager;

// This will play MySound at the default volume of 1 and default pitch of 1.
audioManager.Play("MySound");

// This will play MySound at the volume of 0.5 with the default pitch of 1. You get the idea…..
audioManager.Play("MySound", .5f);

// Using the static instance
AudioManager.instance.Play("MySound");
AudioManager.instance.Play("MySound", .5f);
Audio Args & Hashtables
As of 2.5.0 we have changes how the methods in the main audio manager script work. You can now use the AudioArgs static method or a Hashtable to define all the params for the method. With this change we have also added a few additional params, such as priority and reverb & spatial blend that are not in our standard methods which allows for full customisability. This is also where our play at position and on gameobject methods have been moved to. In 2.5.1 we have moved the AudioArgs to the Audio Helper static class so it can be used without the Audio Manager being static. To use the arguments you can do any of the following, note that inn 2.5.0 you need to pass string values with PascalCase, from 2.5.1 or later string values should be in lowercase:
// Using the static Audio Helper class
Play("myClip", AudioHelper.AudioArgs("position", Vector3.one, "time", 1f));

// Using a Hashtable
Play("myClip", new Hashtable("position", Vector3.one, "time", 1f));
You can also cache a reference for better performance and easy editing like so:
// With Hashtables
// Set in start/awake
var table = new Hashtable();
table.Add("Position", Vector3.one);
table.Add("Time", 1f);

// When you want to play a clip...
Play("myClip", table);